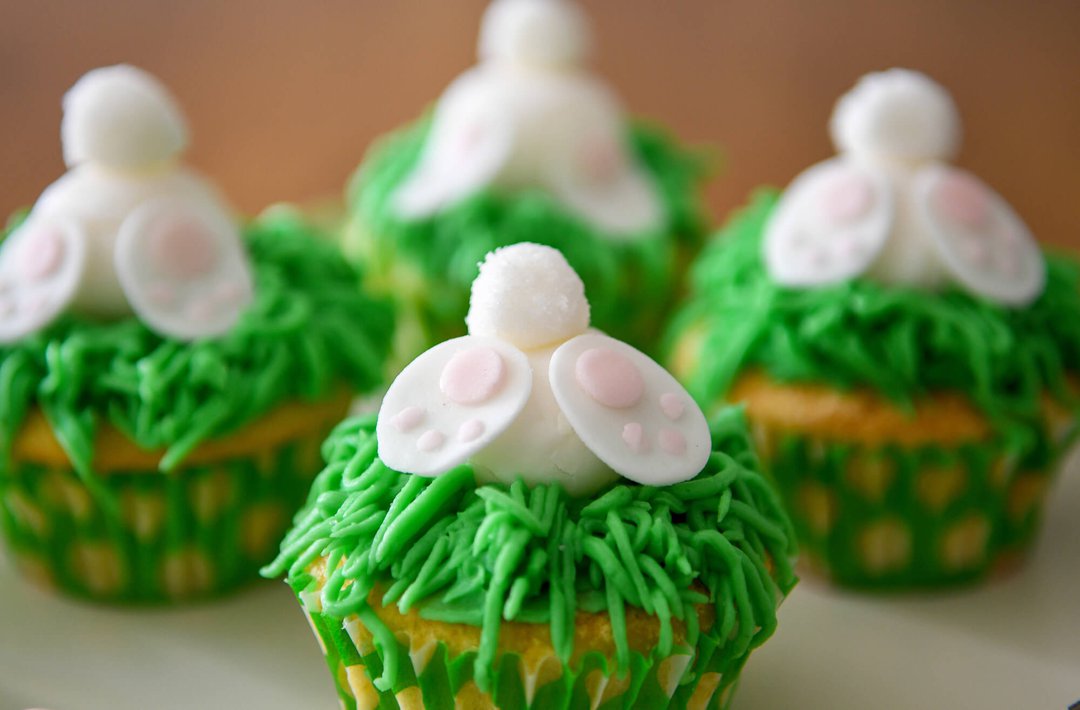
Bunny Butt Buncakes
If you are struggling to find things to do during this time to entertain the kids or just yourself, these Bunny Butt Buncakes are a perfect way to get creative in the kitchen with a few store cupboard ingredients. This recipe only uses 1 egg to make 10-12 cupcakes and you can use any type of milk you can get your hands on: UHT, soya or fresh milk.
But remember folks, these are far too sweet for our pets to eat and are a treat for hoomans only!
Ingredients
Cakes:
- 130g Self Raising Flour,
- 140g Caster Sugar
- 40g Butter, preferably unsalted at room temperature
- 120ml Milk
- 1 egg
- ½ tsp Vanilla extract
- 10-12 Cupcake Cases, we used green, so it was grassier looking
- 12-hole bun tin
Buttercream Topping:
- 250g icing sugar sifted
- 80g Butter, preferably unsalted at room temperature
- Green Food Gel (optional)
- A splash of milk, if needed
- ¼ tsp Vanilla extract
The Bunny Butts:
- 250g White Ready to roll icing
- 75g Pink Ready to roll icing
- (or some pink food colouring) – See Tip
- Icing Sugar
- Granulated/Caster Sugar (optional only if you want a sparkly bunny tail)
Method
Part 1 (the bake):
- Preheat oven to 170oC/Gas 3 (325oF)
- Line a 12-hole muffin/cupcake tin with cupcake cases
- Sift the flour into a bowl and add in the sugar, pinch of salt and soft room temperature butter and beat with an electric hand whisk until smooth.
- Whisk the egg, milk and vanilla extract in a jug with a fork.
- Slowly whisk in the liquid mixture into the flour mixture until smooth. Don’t forget to scrape down the sides of the bowl with a spatula as you go. Mix for a few minutes, but do not over mix or it will split.
- Spoon the mixture until about 1cm from the top, about 2 dessert spoons per cup.
- Bake in the centre of the oven for 20-25 minutes or until the sponge springs back when touched.
- Leave the cupcakes to cool slightly before removing them to a cooking rack.
Part 2 (the bunny butts):
- Whilst the cakes are cooling begin with the bunny feet. Dust a clean dry surface with icing sugar and roll out some of the white icing until about 1mm thick. Cut out 2 circles per cupcake about 2cm wide, we used the end of a large piping tip Wilton 1M but you can cut a circle or roll a small ball then press it down with your finger, whatever works best for you. Then roll these once with your rolling pin so they become more of an oval shape or use your finger to press into an oval shape, this will be a bunny foot. Repeat 20-24 times.
- Then make the pink paws pads. We used a Wilton tip 12 for the paw pad and a No. 4 for the paws but again use what works best for you. You can roll little balls and then press them with your finger to make the pads.
- Take a small brush and some water and dab the areas you would like to stick the paws to make your paw. You will need 1 paw pad and 3 paws to make up each foot.
- Repeat until you have 2 feet per cupcake. Then leave to dry whilst you get on with the tails.
- Take a small ball of white icing and roll into a ball about 1cm across. Use a cocktail/wooden kebab stick to hold the ball and add a bit of water to the ball, just enough to then roll it into some granulated or caster sugar. This will give you a sparkly tail! Repeat 10-12 times and leave to dry. (You can leave out the sugar part if you want to)
- Make the bunny butt. Take another ball of white icing sugar and roll this into a ball about 3cm across. Slightly flatten one side so it sits on the cupcake easier.
- Time to assemble the bunny butt! Using a bit of water and a brush add your bunny tail to the centre of the top of the larger ball and the 2 feet near the bottom to make your bunny butt. Repeat 10-12 times and leave to dry.
Part 3 (the buttercream):
- Whilst the bunny butts are drying make the butter cream. Add the room temperature butter to a bowl and whisk with your electric hand whisk for a few minutes to soften. Sift in your icing sugar then whisk slowly to start with then increase speed once the icing sugar has started to combine. Add in your green food colouring and a few splashes of milk (if needed) and beat for about 5 minutes to make a light and fluffy butter cream.
- You can choose how to add the buttercream on the top of your cooled cakes, make sure you leave a gap in the middle for your bunny butt.
- Using the back of teaspoon or small metal spatula to apply the butter icing
- Apply the buttercream as above and use a fork to flick it up to make a grass like look
- Pipe in a piping bag using whichever piping tip you like
- Use a grass tip piping tip, for the ultimate grass effect or make your own like we did see tip.
- Once you have covered your cakes you can apply your bunnies. Gently lift the bunnies to the centre of the cake and if needed you can pipe around the bunny butt.
- Serve and enjoy! Cakes should last 3-5 days in an airtight container.
You can do whatever you like on the top, add some flowers as well or maybe try and do some bunny ears. Whatever you do have some fun and tag us in @supremepetfoods #supremepet we can’t wait to see your bakes!
Tips
- You can either buy baby pink icing already made or you can make your own with a few drops of pink food dye and work it into the white icing (it would be best to wear gloves so the dye isn’t on your hands or wash them straight away afterwards)
- If you have a few helpers in the kitchen perhaps give them a task each to keep them focused, one on the tails + one on the feet.
- Put a tea towel over the hand whisk when you start mixing the icing sugar to help reduce sugar dust.
- If you have left over icing, you can freeze in bags for next time!
- To make your own grass piping tip we put the icing into a piping bag with a round end nozzle, using the uncut piping back pull over the end of the nozzle and tape down over the side with some sellotape. Using a cocktail stick or wooden skewer pop a few holes in, you’ve now made your own grass piping tip!